Header-Desktop

Home About Tutorials Patterns Shop Main Image Map

October 18, 2013

Sweatshirt to Tunic Makeover

I have a quick project to share today.

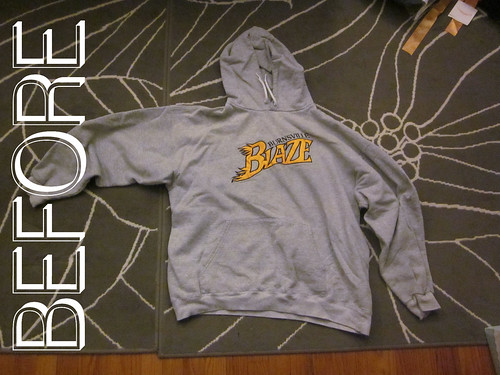
It was time to retire this high school sweatshirt, and I have been excited to try my hand at a sweatshirt remake. I have done a few remakes in the past, mostly with mens' dress shirts, but I haven't loved how some of them turned out.  They work, but sometimes working isn't good enough, you know?

IMG_2731 


With this sweatshirt, I decided to really focus on the fit and make it work well. So here is what I did to it.

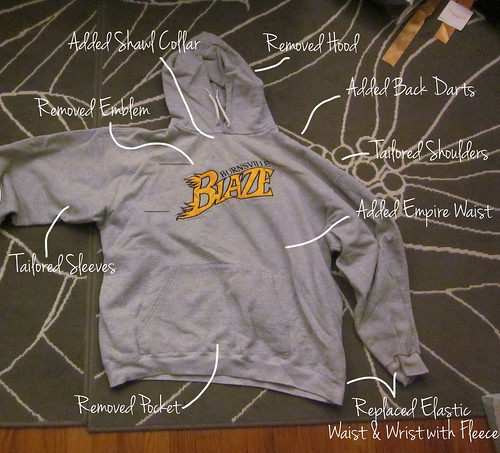
SweatshirtRemake

First, I removed the emblem and pocket and cut out the hood. I wanted to narrow the shoulder line, so I cut out most of the space where the emblem was, and I added two back darts in alignment with the neckline. These darts also helped narrow the neck because the hoods on sweatshirts is always nice and roomy (not so nice for a new collar). I added a 3" shawl collar in a neon fleece I had leftover from making cloth diapers.

I cut off the sleeves to make the arm hole in the bodice a little smaller, and then I tailored the sleeves a bit by adding a sleeve sloper (the sweatshirt had a boxy sleeve as seen in the before photo), and by narrowing the arm. The sloper made the sleeves much shorter, so I removed the wrist ribbing and added more fleece as an accent. The tunic would have worked just as well with 3/4 length sleeves, but I like having the full length.

I added length to the sweatshirt with another fleece band. My final step was to add an empire waste just under the shawl collar base. It's at an empire level now, with my pregnant self, but I'm guessing it will drop a bit without a belly.

Sweatshirt-After 

Since this baby is almost here, I wanted to make something that would be useful all winter. I think this fits the bill. Now I can be cozy but not look as sloppy as a big bulky sweatshirt!

(trust me, there are other big bulky sweatshirts that will also see plenty of use too :) )

October 7, 2013

Baby Showers & Mobiles

It's been busy around here! We had future grandparents visiting among two baby showers. It is pretty clear that this kid is well loved by lots of people around us :)  We received many necessities...diapers, bottles, books, clothes...but I'll be honest, the best was an owl cake from our local bakery, SugarBakers, which my sister so kindly "sent" from 1,500 miles away because she couldn't be here in person.

Baby Shower Cake

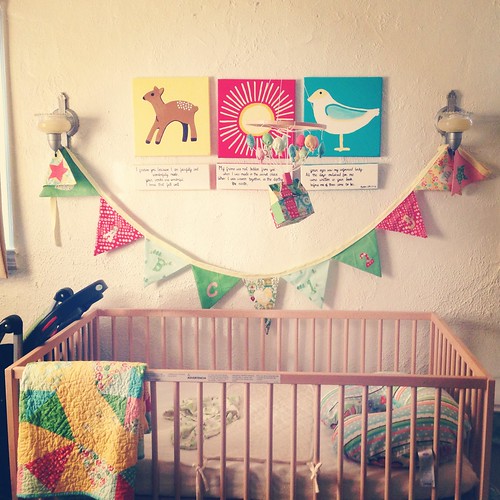
I also received a lot of support for my love of Hideaway.  One friend made us this wonderful set of three paintings inspired by objects found within the Hideaway line. Part of the decor at another shower included the adorable bunting found in this photo as well, made out of, you guessed it, Hideaway!

Nursery

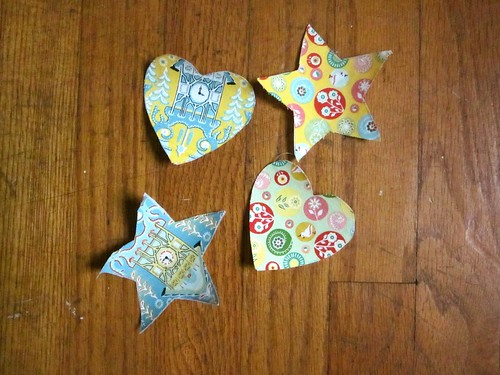
I even got some extra shapes, pre-backed with wonder-under, to add to some of our plain onesies.

Onesie shapes

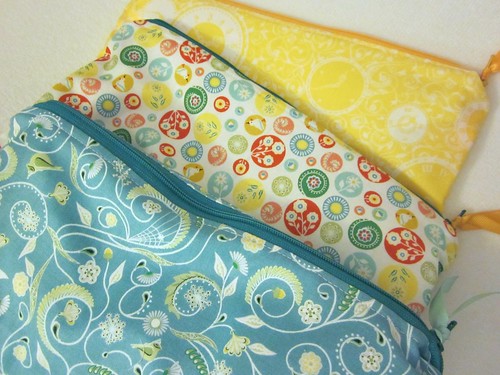
I loaned out the remainder of my Hideaway stash, part of which became this set of wet bags for our on-the-go cloth diapering.

Wet bags

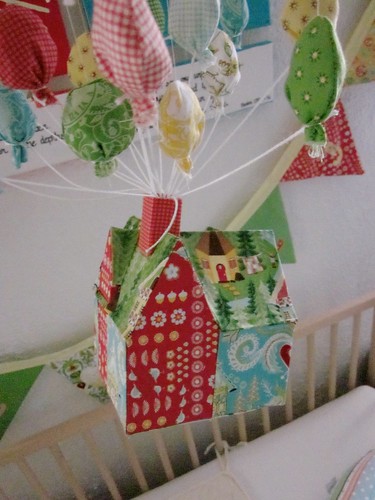
And while I'm hiding away, here is a close-up of the mobile I made for Little One. It is inspired by the Pixar movie "Up" (which we love - old men have a special place in my heart) but with a Hideaway theme. I just made a small model of the Fredricksen house out of mat board, covered it in fabric scraps with glue, and hung it from an embroidery hoop. I added extra strings coming from the chimney to attach balloons, but they are hung with thin thread from the hoop to keep them "floating." This is the back of the house, technically. It kept spinning away from the photo :)

Untitled


I think that about wraps up our nursery (which also happens to be part unused-dining-room in our one-bedroom apartment). Since it's only part of a room in a rental, there really isn't a whole lot of decorating to do!

September 20, 2013

Goody Two Shoes

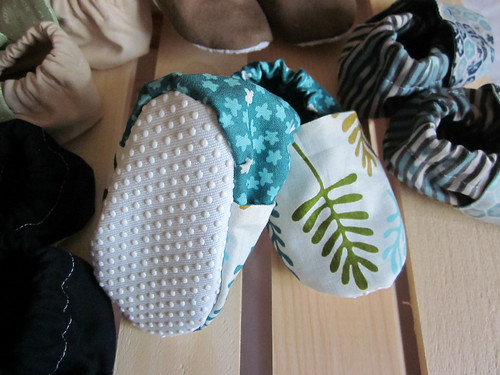
I'm back with more baby ware! This time, baby's style is enhanced by a healthy collection of shoes.

GoodyTwoShoes1

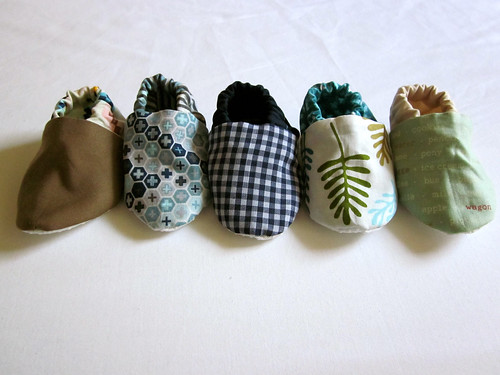
I made five (what baby needs five pairs of shoes? mine) pairs of these Teeny Tiny Goody Two Shoes - a pattern by Allison Jones from the book Meet Me at Mike's (curated by Pip Lincolne). I found the book at my local library. Let me tell you, my library really likes to support the modern sewist.

GoodyTwoShoes3

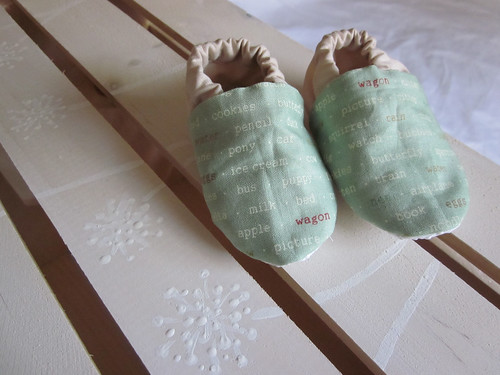
I used fabric from my stash (it's a trend around here), and these cute little green ones are made with fabric that my husband bought for me for Christmas over two years ago. Finally found the perfect use for it :)

GoodyTwoShoes4

I used non-skid fabric for the soles, just in case Babes starts to venture onto two feet before he or she grows out of them. I found this fabric as a remnant at Hancock Fabrics a long time ago, but I haven't come across it since.

But wait, there's more! There are two more pairs waiting Baby's arrival.

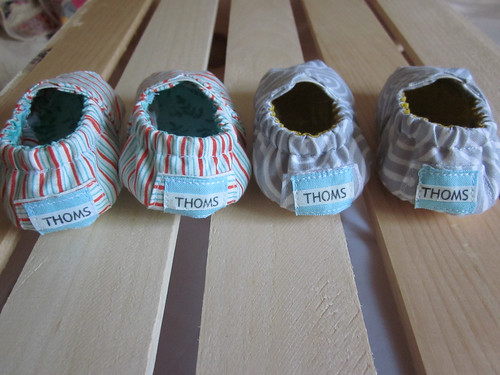
Thoms1

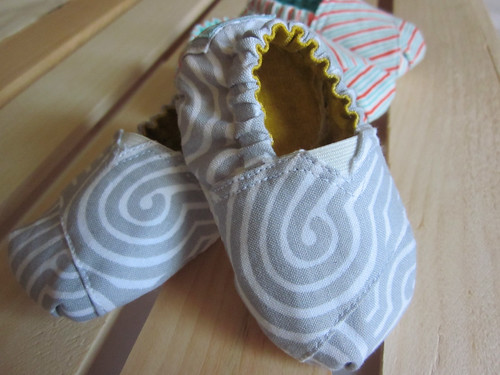
Yep, that's right, Little One's very own pairs of Thoms, not Toms (because of our last name).  I used Leisha's free pattern from Homemade Toast for newborn shoes, but she sells a pattern for infant, toddler, and children sizes as well!

Thoms2

Again, you guessed it, stash fabric, along with non-skid soles. These are so tiny, though, I don't imagine the non-skid getting much use. Let me tell you, I battled these shoes a bit. First with trying to print the tags - we were running out of ink, I had three opportunities to print correctly (mirror image in b&w) and of course it took me 4 to get it right :) I also burned two tags while ironing them, which explains why my versions do not have the traditional tag on the side of the shoe.

Lessons learned. But hey, they still turned out cute!

September 17, 2013

Basic Newborn Pants

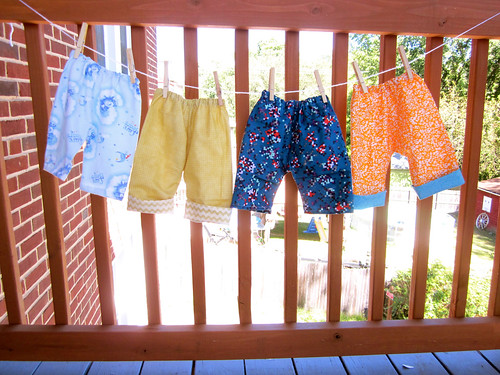
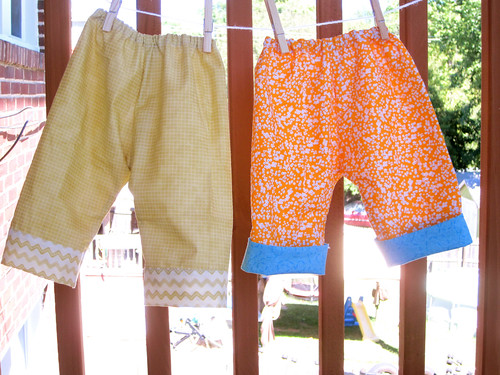
I wrapped up a few bottoms for Baby today :) I made these little pants using the Basic Newborn Pant pattern from Rae at Made by Rae.  These pants sew up so quickly - 3 seams, 3 hems, and some elastic. It doesn't get much easier.

NewbornPants1

I would warn any go-getters to make sure you keep track of which seam is the leg seam and which is the center seam; otherwise you may end up with a tiny little rise and butt!

I decided to just use up fabrics in my stash. I admit, they don't match and make a collection, but individually, they are each cute!

The tutorial states that the hip circumference is the same as a 6-12 month pattern Rae sells, so they may work for older babies too. With that in mind, I opted to add a little folded cuff to two of the pants, which can be unfolded when Little One gets too tall for the newborn length. For this, I just took the width measurement at the bottom of the leg seam and created a rectangle with that length and a height of 4-5".

NewbornPants3

I would highly recommend this pattern - it is so straightforward and Rae makes it really easy to follow!

September 12, 2013

Newborn Sleep Sacks

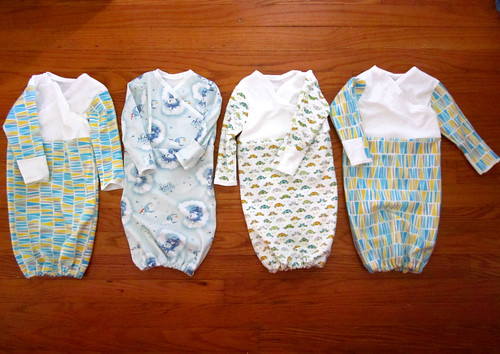
When I saw these sleep sacks on pinterest, it took me about 2 seconds to decide to make some of my own.  It just took me until yesterday to finish them :)

SleepSacks1

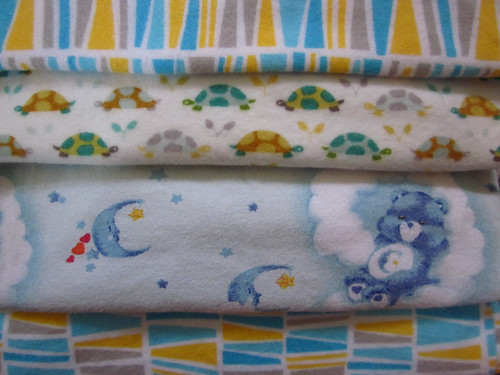
I had to get the fabric, because despite my stash, I had no gender-neutral flannel or usable jersey to speak of.  First, I cut up a [really] old pair of Care Bear pajama pants because no one my age should own them (full disclosure: they are from college).  I decided to order organic cotton jersey, which was soft, relatively thin, and had lots of movement, along with a flannel in a geometric print. My favorite fabric, however, is Turtle Parade from the Les Amis flannel collection by Patty Sloniger for Michael Miller. I've been loving teal lately, and I love turtles. I always have and always will. You may notice the turtle one is a bit special with the fabric upside-down on the back of the arm. I was clearly not paying attention to the fabric direction.

SleepSackFabric

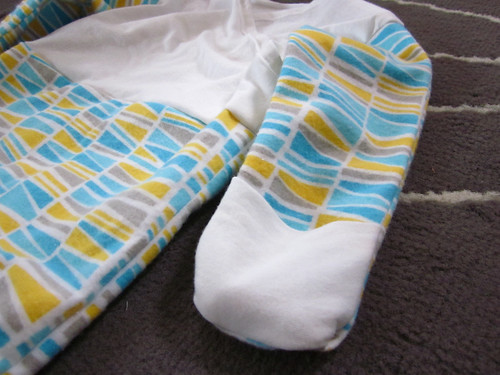
The pattern is from Jessica at Running With Scissors, and I really like how she included a fold-over cuff to help prevent Baby's sharp little finger nails from doing damage. The pattern is for a newborn size, but mine came out slightly bigger than newborn (or at least I hope I don't have to push out a baby that big).  Maybe with a wash, they will cinch up a bit. I used a half-inch seam allowance throughout.

SleepSackCuffs

Now all we need is a baby to fill them!

SleepSack2

September 10, 2013

Cameo Journals

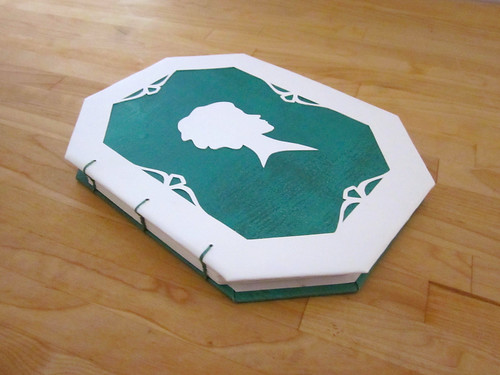
You may not know this about me, but I dabble in paper crafts. Mostly just making journals and hand-drawing cards for loved ones, but I've been putting some items up for sale in my shop. I just finished my favorite journals yet - octagonal Cameo journals in pink and teal.

  TealCameo1

Architecture school taught me one very good lesson - precision Xacto cutting. I definitely employed that skill for these journals :)

Hop on over to the PieceGardenStudio shop to check out more details!

September 4, 2013

Triangle Quilt Finish

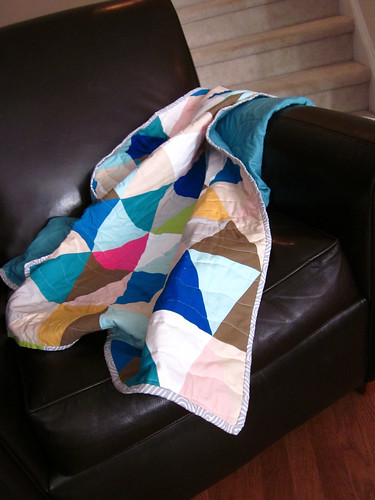
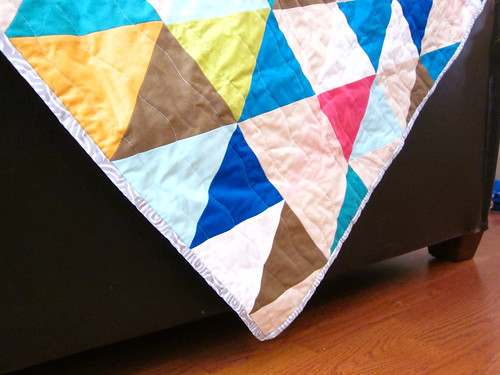
We spend Labor Day with the same close friends every year, some of whom we only get to see once per year for this one [awesome] weekend before we all head back to our respective corners of the country.  One of our friends has been going through some tough life things since last year, and I wanted her to know how much we've been thinking about her and how much we love her... so I made her this quilt.

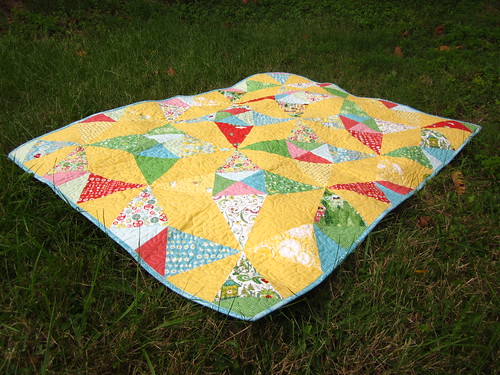
Triangle Quilt
(it's fun to have two willing quilt holders :) )
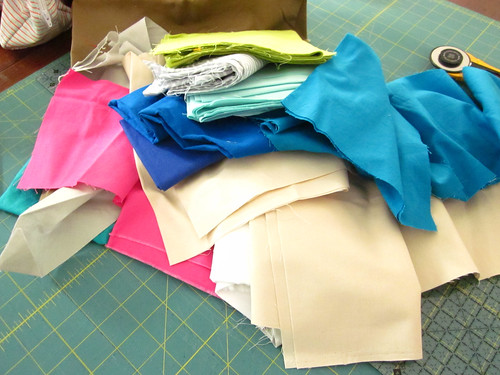
Our yearly weekend is spent at the lake, complete with crazy fun tubing, skiing, and kneeboarding, bright blue skies with epic sunsets, and tons of laughs. I think the colors in this quilt pretty well capture the vibe. I used 11 different Kona solids to achieve the look. This was my first pass at pulling fabrics...I later added the yellow and pale pink.

Triangle Quilt Pile

You may have seen me tease this quilt on Instagram a couple of weeks ago.  I was inspired by this triangle quilt from Happy Together, but I used a few more colors and made mine a little bigger.

Triangle Quilt 2

I used a gray & white swirly fabric for the binding, something I have had in my stash waiting for the perfect project for years. The backing is a cotton/poly blend teal color.  Quilting is just wavy lines horizontally across the quilt.

Triangle Quilt 3

Triangle Quilt
Size: 56" x 60"
Pattern: Inspired by Happy Together
Fabric: Assorted Kona Solids

August 27, 2013

Newborn Crochet Letterman Sweater - Pattern

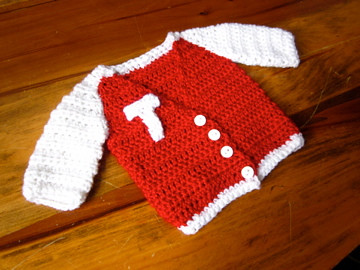
I shared this vintage-style V-neck Letterman sweater here on Friday.

newborn baby boy sweater

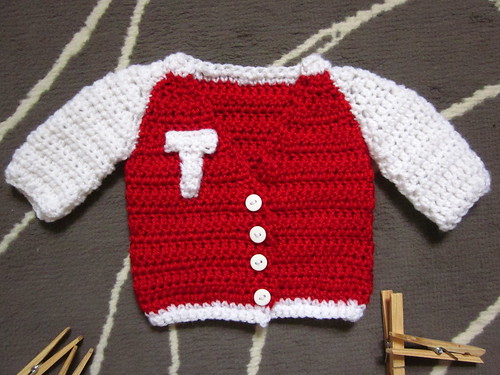
Today I thought I'd share the pattern in case you (1) love to crochet, (2) love little babies in old-man clothes, and (3) wanted to make your own!  It is pretty straightforward, worked from the bottom up, with seams around the armholes and finishing rows at the neck and waist.

Newborn Crochet Letterman Sweater
This pattern is for personal use only. Please do not sell finished items or reproduce any portions of the pattern. Feel free to link back to it here, though!

Hook size: G
Gauge: 4 dc = 1"

Ch 66
Row 1: dc in third chain from hook, continue 62 dc across (64 dc, first chains count as one dc), turn
Row 2-7: ch 3 (counts as first dc), dc in each st across (64 dc), turn
Row 8: ch 3, dec, 59 dc, dec (62 dc), turn
Row 9: ch 3, dec, 57 dc, dec (60 dc), turn
Row 10: ch 3, dec, 55 dc, dec (58 dc), turn
Row 11: ch 3, dec, 53 dc, dec (56 dc), turn

beginning of right chest panel (a)
Row 12a: ch 3, dec, 8 dc, dec (11 dc), turn
Row 13a: ch 3, dec, 6 dc, dec (9 dc), turn
Row 14a: ch 3, dec, 4 dc, dec (7 dc), turn
Row 15a: ch 3, dec, 2 dc, dec (5 dc), turn
Row 16a: ch 3, dec, dec (3 dc)
finish off


left chest panel (b)
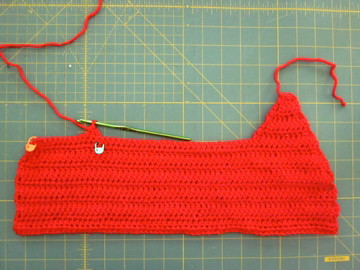
Begin thirteen stitches from the end of row 11 (shown by the green stitch marker in the photo below)

IMG_2510

Row 12b: ch 3, dec, 8 dc, dec (11 dc), turn
Row 13b: ch 3, dec, 6 dc, dec (9 dc), turn
Row 14b: ch 3, dec, 4 dc, dec (7 dc), turn
Row 15b: ch 3, dec, 2 dc, dec (5 dc), turn
Row 16b: ch 3, dec, dec (3 dc)
finish off


back panel (c)
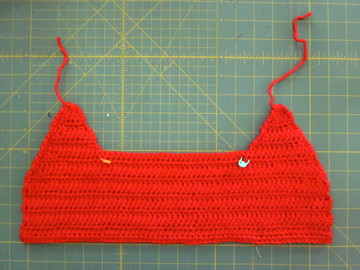
Begin in the stitch directly after the right chest panel ends (shown by the green stitch marker in the photo below)

IMG_2513

Row 12c: ch 3, dec, 27 dc, dec (30 dc), turn
Row 13c: ch 3, dec, 25 dc, dec (28 dc), turn
Row 14c: ch 3, dec, 23 dc, dec (26 dc), turn
Row 15c: ch 3, dec, 21 dc, dec (24 dc), turn
Row 16c: ch 3, dec, 19 dc, dec (22 dc)
finish off

sleeves (make 2) - contrasting color, if you choose
ch 17
Row 1: sc in second ch from hook, sc across (16 st)
Row 2: ch 2 (counts as first hdc), hdc in next two st, *2 hdc in next st, hdc in next two st* 4 times, hdc in next st (20 hdc), turn
Row 3-10: ch 2, 19 hdc (20 hdc), turn
Row 11:  ch 2, dec, 6 hdc, dec, 7 hdc, dec (17 hdc), turn
Row 12:  ch 2, dec, 5 hdc, dec, 5 hdc, dec (14 hdc), turn
Row 11:  ch 2, dec, 3 hdc, dec, 4 hdc, dec (11 hdc), turn
Row 11:  ch 2, dec, 6 hdc, dec (9 hdc), turn
Row 11:  ch 2, dec, 4 hdc, dec (7 hdc), turn
Row 11:  ch 2, dec, 2 hdc, dec (5 hdc), turn
Row 11:  ch 2, dec, dec (3 hdc)
finish off

Attach the sleeves to the sweater body, and finish the sleeve seem from armpit to wrist.

Neck finishing rows - contrasting color if you choose
Pick up stitches around the neck from the chest panels, sleeves, and back panel.
Row 1: ch 1, sc in same st, 2 sc, dec, *4 sc, dec* 4 times, 2 sc (26 sc)
Row 2: ch 1, sc in same st, sc, dec, *3 sc, dec* 4 times, 2 sc (21 sc)

Waist finishing rows - contrasting color if you choose
Pick up stitches around the waist
Row 1: ch 1, sc in same st, *dec, 4 sc* 10 times, dec, sc (53 sc)
Row 2: ch 1, sc in same st, 52 sc (53 sc)

Attach your letter of choice, and you are all set!

IMG_2564

August 23, 2013

Crocheted Newborn Take-home Sweaters

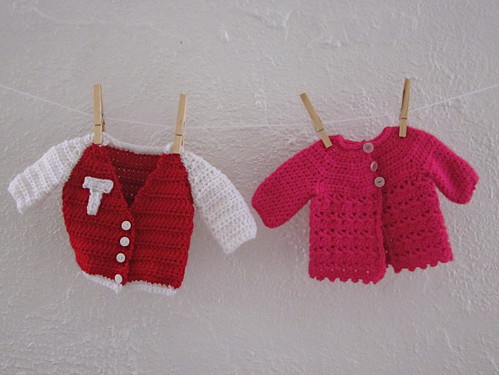
Not knowing the Babe's gender has been so fun and exciting. I haven't hit that point [that everyone keeps telling me I will hit] when I wish we just knew.  I am hoping that excitement carries through to the delivery room, but just in case, I made these little sweaters as a visual reminder of the amazing impending surprise.

newborn take-home sweaters

I want the Little One to have a special handmade memento from the newborn phase (or maybe I want it to remind me how tiny he or she once was), and I want a special heirloom for that momentous trip home from the hospital.

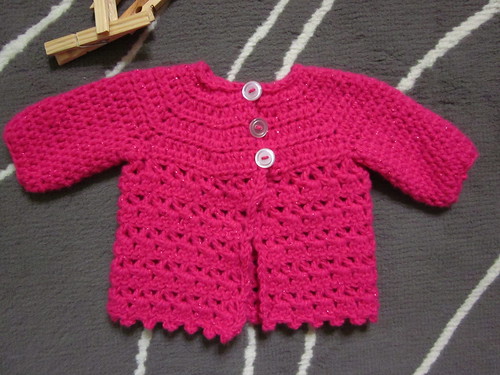
Thanks to a routine trip to the mechanic, I had plenty of time to wrap these up this week.  I made them with leftover yarns I already had on hand. The newborn baby girl sweater is based on this pattern from ravelry, but I used a smaller hook (G) and chose not to do the picot edge on the sleeves.

newborn baby girl sweater

I made my own pattern for the newborn baby boy sweater. I wanted it to like an old-fashioned V-neck letterman's sweater, like something fresh out of the 50s.  The T is for Team Thomas :) I will be sharing the pattern next week!

newborn baby boy sweater

August 20, 2013

Nursing Cover Scarf & Tutorial

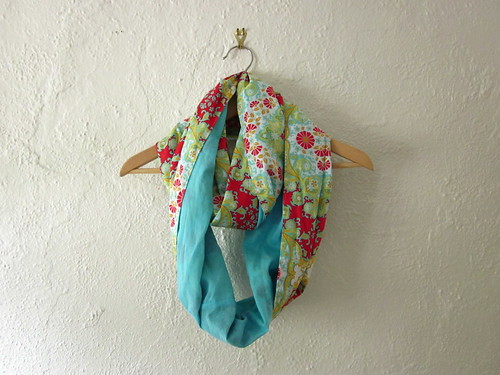
I am so intimidated by all the STUFF that comes along with having a child. I'm naturally not a "stuff" kind of gal, and a lot of what I have serves me in multiple ways. Enter: the multi-purpose Nursing Cover Scarf.

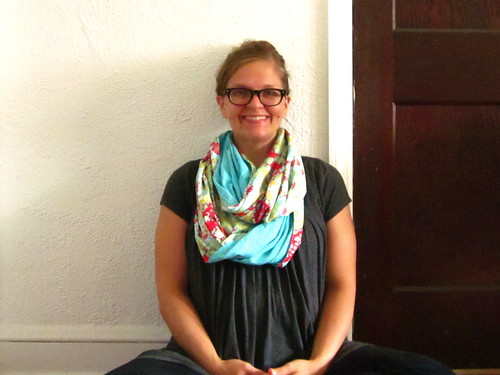
Nursing Cover Scarf
I am linking this project to Quiltstory's Fabric Tuesday this week! 
Pop on over there and see what everyone else has been up to!

Baby arrives in November - prime scarf season. Chances are, when we finally get around to exiting the house, I will be more likely to wear a scarf than to pack a nursing cover.  Just one more thing the diaper bag doesn't need.  I used a combination of voile and lawn because they are so buttery soft and lightweight with lots of drape, and I think Baby's heat will be cozy enough for me.

Nursing cover as scarf

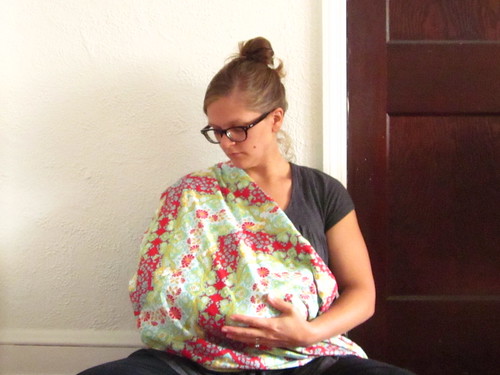
I love this scarf just as a scarf. I made it extra long (71" around) because I like my scarves to have some roominess. And bonus - just unwrap it, throw it over one shoulder, and you have a nice cozy nursing cover. I think it also looks a little more natural, and I won't have to search around for a blanket or something else to use. And if the whole nursing thing doesn't work out as planned, I still have a cute scarf.

Nursing cover as cover

Here's how to make your very own!

Nursing Cover Scarf Tutorial
This pattern is intended for personal use only - please do not sell finished products or reproduce the pattern or portions of the pattern. Feel free to link back to the tutorial here, though!

Finished Size: 22.5" wide & 71" around
Fabric requirements: 2 yards voile or lawn. I used 1 yard of Notting Hill Kaleidoscope voile in Poppy by Joel Dewberry (front), and 1 yard of coordinating aqua lawn (back). You can use quilting cotton, but please note that your finished scarf will be slightly narrower in width and slightly bulkier.

Seam allowance is always 1/4"

Step 1:
(A) If you are using a continuous 2-yard piece of material, cut a rectangle 45.5" x 72", and skip to step 3.

(B) If you are using two coordinating 1-yard fabrics, cut two 23" x 36" pieces from each.

Step 2: 
With right sides together, sew the two front pieces together along one of the 23" sides, creating a 23" x 71.5" piece. Press this seam open. Repeat for the back. (for my scarf, the front is the Kaleidoscope print, and the back is the aqua solid)

Step 3:
(A) Following step 1, with right sides together, fold your rectangle in half lengthwise (72" side to 72" side) and sew along the long open edge, creating a 22.25" x 72" tube.

-or-

(B) Following step 2, with right sides together, sew the front to the back along both long edges, creating a 23" x 71.5" tube.

Step 4: 
Turn your tube right sides out.

Step 5: 
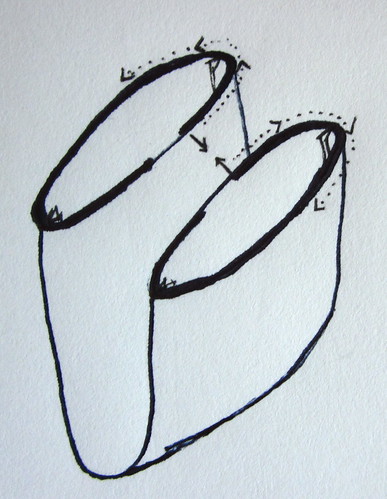
This is the trickiest part. With right sides together, matching side seams to side seams, begin sewing around the tube ends. Continue sewing around, leaving a 3" - 5" opening (following the dotted arrows and bold lines in the diagram below).  As you sew around the tube, you may have difficulty with the seam closing in on you. If this is the case, just leave a larger opening.

Closing the tube diagram

Step 6: 
Press the seam allowance of the remaining opening toward the wrong side, and close this opening with a blind stitch (or if you want it done quickly, edge stitch the remaining opening).

Step 7:
Topstitch around the long edges of the scarf to help keep the width in tact through washing cycles without having to press it.

And there you have it! Your very own nursing cover, or scarf, or nursing cover scarf :)

August 19, 2013

Hide-oscope Baby Quilt Finish

I started this quilt over two years ago with Elizabeth's Kaleidoscope Quilt Along at Don't Call Me Betsy.  I finished making the blocks with the quilt-along, but I fell off the wagon after that because, in true budget fashion, I didn't want to buy the batting. The finished blocks made three moves with me, and when we found out we were expecting, I knew I had to wrap it up.

Hide-oscope Finish 1

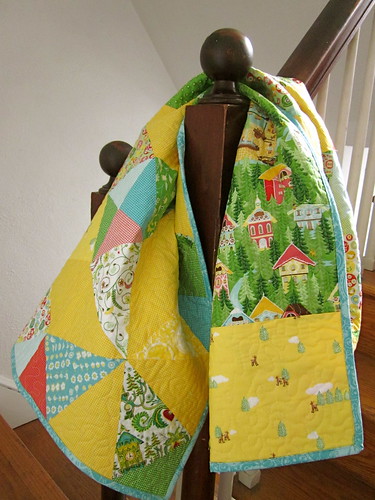
I chose to use my bundle of Hideaway by Lauren & Jessi Jung - a line I had loved from the moment I laid eyes on it.  Since we are not finding out Baby's gender, these prints set the tone for our neutral nursery style. Maybe they lean a little boyish, but I like how the aqua-teal blue balances that out.  I also like how they pack a little bit of whimsy without being in-your-face baby.  I backed the quilt with a large piece of the green House print, along with the yellow and green Deer prints.

Hide-oscope Finish 2

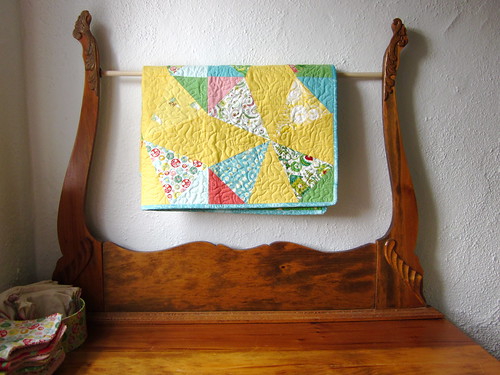
I quilted this little number with an all-over squiggle. I really liked doing the squiggles since this baby-sized quilt was so much easier to manage than other quilts I have made. The quilt will probably hang out on our antique-dresser-turned-changing-table-with-towel-rack while we await Little One's arrival.

Hide-oscope Finish 3

Hideoscope Baby Quilt
Finished size: 36" x 48"
Pattern: Kaleidoscope from Elizabeth / Don't Call Me Betsy
Fabric: Hideaway by Lauren & Jessi Jung
Quilting: All-over squiggle (no loops)
Binding: Clocks in blue from the Hideaway line

August 16, 2013

Back at the Helm

Hey there! There has been no shortage of sewing and crafting around here - just a shortage of talking about it! But I have really missed the community of all you fellow sewists and creators out there. I have so many projects to share, but I have been focused on two most recently.

First, I have been working on redesigning my blog. If you are reading through a feed reader, click on through and check it out! Nothing like a little spring cleaning to reenergize the blog. It is definitely still in process, but it's getting there.

BlogHeader2

The other project is a real doozy. It's taking a lot of planning and energy. Here is a little preview.

babyt

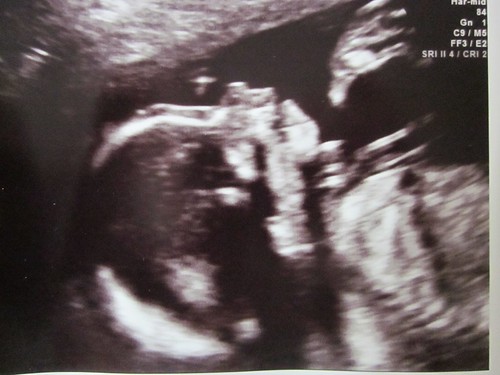
That's right, that is our little bit, trying to suck its toes! Baby is set to arrive in November, just under three months away. We won't be finding out the gender until he or she arrives, so a lot of neutral baby projects have been in process around here.  More on those later.

Have a great weekend!